

Polishing stainless steel is a controlled material-removal process used to reduce machining marks, burrs, weld discoloration, and microscopic peaks. The goal may be a consistent satin appearance, a low surface roughness, easier cleaning, reduced product buildup, or a highly reflective mirror finish. For precision CNC parts, however, polishing must improve the surface without rounding edges, enlarging holes, altering sealing faces, contaminating the alloy, or erasing critical geometry.
This guide explains how to polish stainless steel step by step, how mechanical polishing differs from electropolishing and passivation, and how engineers can specify the right finish for photonics, quantum instruments, food machinery, medical devices, and dental equipment.
What Does Stainless Steel Polishing Actually Do?
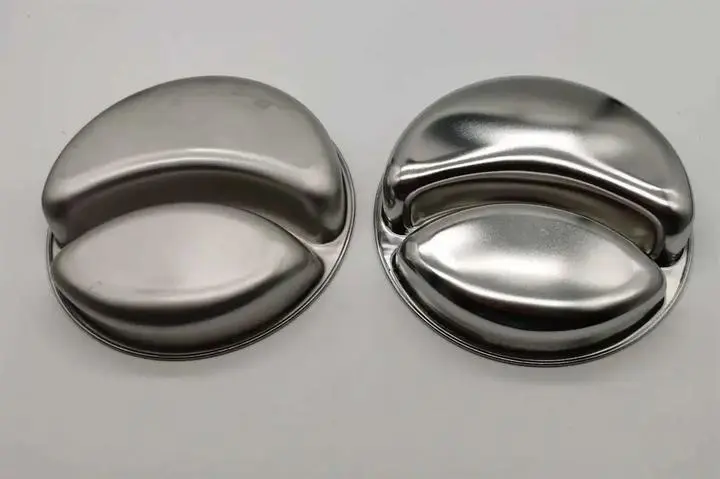
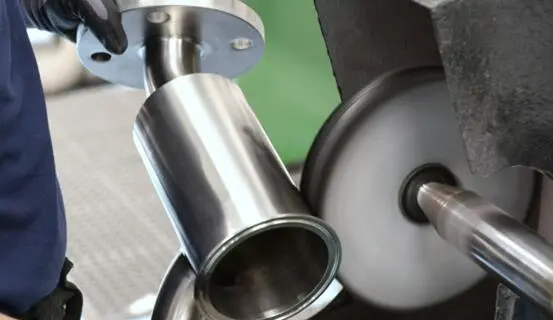
Mechanical polishing removes material through progressively finer abrasives. Coarse abrasives level tool marks and defects; finer abrasives reduce the scratch depth left by the previous stage; buffing compounds then refine gloss and reflectivity. Electropolishing uses controlled anodic dissolution to preferentially smooth microscopic peaks. Passivation is different again: it removes free iron and supports formation of the chromium-rich passive layer, but it is not intended to level a rough surface.
| Process | Primary Function | Typical Result | Dimensional Risk |
| Mechanical polishing | Levels visible defects and changes texture | Brushed, satin, bright, or mirror appearance | Localized stock removal; possible edge rounding |
| Electropolishing | Smooths microscopic peaks electrochemically | Cleaner, brighter surface with reduced micro-roughness | Controlled material removal over exposed areas |
| Passivation | Removes free iron and supports passive-film formation | Little or no intentional appearance change | Normally minimal; not a polishing substitute |
| Bead blasting | Creates a uniform matte texture | Low-glare, diffuse appearance | Can affect texture and embed contamination if media control is poor |
Before You Polish: Define the Functional Surface
Start with the part function, not with a photograph of a shiny surface. A lens mount, vacuum-compatible quantum sensor housing, sanitary manifold, surgical instrument component, and dental handpiece sleeve can all require different finishes even when they are made from the same stainless steel grade.
- Material grade and condition: 303 machines well but may be less suitable for aggressive corrosion environments; 304 is versatile; 316/316L is frequently selected where corrosion resistance, cleaning, or biocompatibility-related design requirements are more demanding.
- Surface objective: cosmetic consistency, low glare, cleanability, reduced residue retention, sealing performance, or reflectivity.
- Measurable requirement: specify Ra or another appropriate roughness parameter and state the measurement location and cutoff method.
- Geometry protection: identify threads, bearing fits, optical datums, gasket lands, sealing faces, sharp edges, laser-marking zones, and masked areas.
- Post-treatment: cleaning, passivation, electropolishing, ultrasonic cleaning, controlled packaging, or other project-specific requirements.
- Acceptance criteria: approved sample, visual comparator, directional lay, gloss range, roughness report, inspection method, and allowable cosmetic zones.
How to Polish Stainless Steel Step by Step
Step 1 — Inspect, Degrease, and Protect Critical Features
Inspect incoming parts under consistent lighting. Record deep scratches, pits, weld defects, burrs, heat tint, and areas where machining marks are acceptable. Degrease the surface so oil does not load the abrasive or conceal defects. Mask or fixture precision features before polishing. For critical parts, retain a witness sample or first-article photograph.
Step 2 — Remove Burrs and Deep Tool Marks
Begin only as coarse as necessary. A common industrial sequence may start around 120–180 grit for pronounced machining marks, then move to 240–320 grit for refinement. The exact starting grit depends on the incoming surface, alloy, geometry, and required stock removal. Do not jump too far between grits: deep scratches from an early stage may remain visible after buffing.
Step 3 — Establish a Uniform Scratch Pattern
For a brushed or satin finish, maintain a controlled abrasive direction and consistent pressure. Work the full cosmetic zone rather than blending only one small patch, which can create a visible halo. For mirror polishing, change direction between abrasive stages when geometry permits; this makes residual scratches easier to detect before advancing.
Step 4 — Progress Through Finer Abrasives
A typical refinement sequence may continue through 400 and 600 grit. Higher grits—such as 800, 1200, 1500, 2000, or finer—may be used before final buffing when a high-reflectivity surface is required. Grit number alone does not guarantee a particular Ra because abrasive type, belt condition, pressure, speed, lubrication, part geometry, and operator technique all affect the result.
Step 5 — Buff for Bright or Mirror Appearance
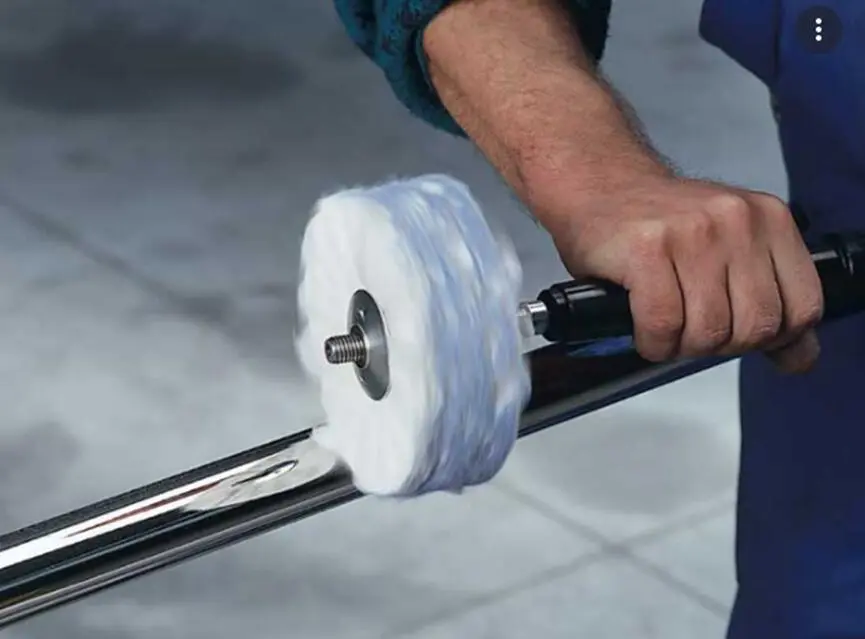
Use a dedicated stainless steel buffing wheel and a compound matched to the alloy and finish stage. A harder wheel and cutting compound may be used for initial brightening, followed by a softer wheel and fine finishing compound. Keep the tool moving to avoid local heating, waviness, drag lines, or distortion—especially on thin walls and sealing surfaces.
Step 6 — Clean, Passivate When Required, and Inspect
Remove all polishing compound and abrasive residue, including material trapped in holes, crevices, threads, and internal channels. Use a documented cleaning process compatible with the part and its final application. Where corrosion performance requires it, specify passivation after mechanical finishing. Inspect visual consistency, directional lay, roughness, dimensions, edge condition, cleanliness, and packaging protection.
Practical Grit Sequence for Different Finish Goals
| Finish Goal | Possible Starting Point* | Refinement | Final Stage | Key Control |
| Remove machining marks | 120–180 grit | 240–320 grit | As required by next operation | Protect datums and avoid low spots |
| Brushed / satin | 180–240 grit | Match approved texture | Single-direction finishing pass | Keep grain direction consistent |
| Bright polish | 240–320 grit | 400–600 grit | Cut and color buff | Remove prior scratches completely |
| Mirror polish | Fine defect removal | 600–2000+ grit as needed | Fine compound and soft buff | Control waviness, heat, and optical distortion |
| Internal passage | Geometry-dependent tooling | Abrasive flow / specialized media | Clean and verify | Confirm residue removal and accessibility |
*These ranges are process-planning examples, not universal specifications. Always qualify the sequence on the actual alloy, geometry, and acceptance criteria.
Stainless Steel Finish Grades vs. Engineering Roughness
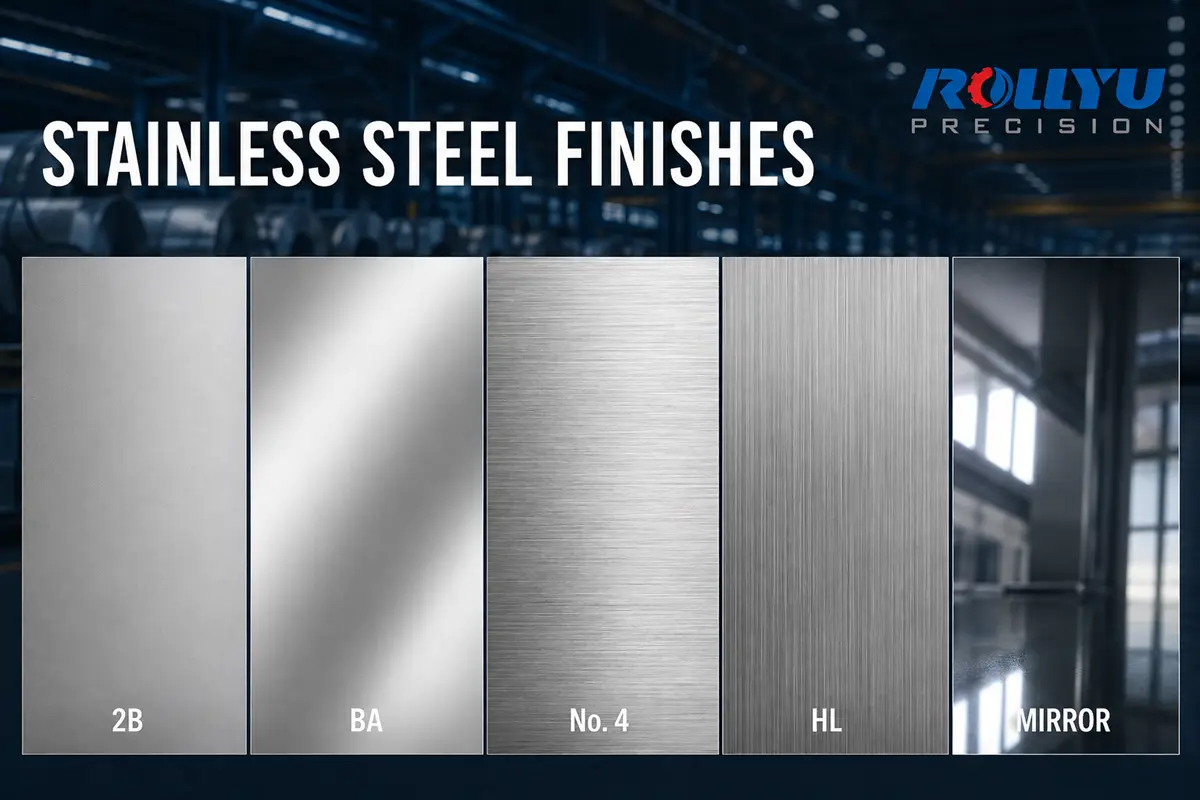
Mill and architectural finish labels—such as 2B, BA, No. 4, hairline, and No. 8/8K—describe manufacturing route and visual character. They are useful for sheet and visible panels, but precision-machined parts often require a more explicit engineering specification. Two surfaces can look equally bright yet have different Ra values, waviness, directional lay, embedded contamination, or edge condition.
| Finish | General Appearance | Typical Use | Specification Note |
| 2B | Smooth, matte to lightly reflective | Industrial sheet, fabricated equipment | Good baseline; not a polished mirror |
| BA | Bright, smooth, reflective | Appliances, clean panels, formed parts | Produced by bright annealing; not identical to mechanical mirror polishing |
| No. 4 | Directional satin / brushed | Food equipment, panels, housings | Define grain direction and approved sample |
| HL / hairline | Long, continuous linear grain | Decorative panels and covers | Primarily an appearance designation |
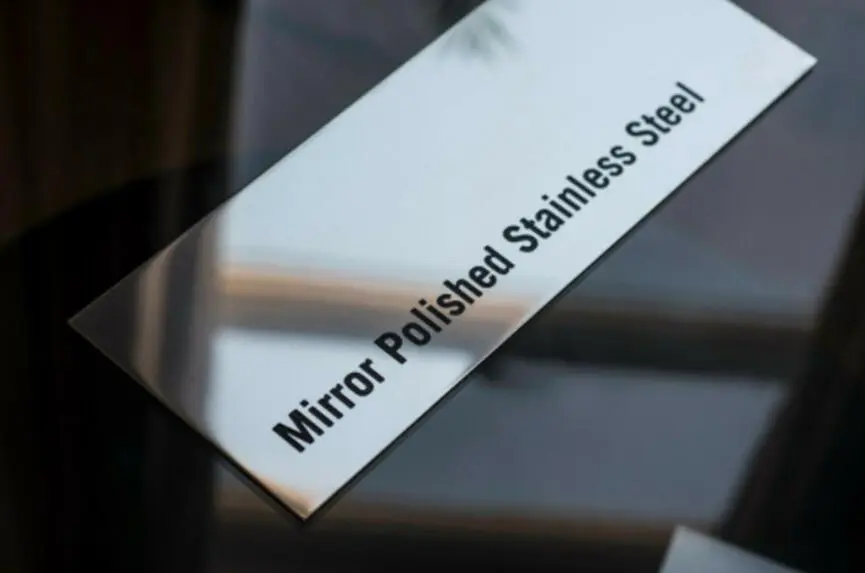
| No. 8 / 8K | Highly reflective mirror appearance | Visible premium surfaces and special equipment | Also specify flatness, distortion, and inspection lighting when critical |
How to Polish Scratches Out of Stainless Steel
First determine whether the surface is brushed, satin, bead-blasted, bright, or mirror polished. A repair that crosses the original grain can make the defect more visible. Clean the area, identify the scratch depth, and test the least aggressive abrasive on a noncritical sample. Blend over a sufficiently large zone, follow the original lay on brushed parts, and re-create every subsequent finishing stage. Deep scratches that penetrate a critical sealing surface, reduce wall thickness, or cross a tight-tolerance datum should be reviewed by engineering rather than cosmetically blended.
Mechanical Polishing vs. Electropolishing
| Decision Factor | Mechanical Polishing | Electropolishing |
| Best suited to | Visible surfaces, directional grain, localized defect removal | Complex exposed geometry, microscopic smoothing, cleanability |
| Texture control | Excellent for brushed, satin, and mirror aesthetics | Produces a bright, micro-smoothed surface without directional abrasive lines |
| Geometry concern | Can round edges or create localized low spots | Removes a controlled layer from exposed surfaces; current density varies by geometry |
| Internal features | Limited by tool access | May reach exposed internal surfaces, but fixturing and solution flow still matter |
| Post-process need | Thorough cleaning; passivation may be specified | Thorough rinsing, neutralization, drying, and verification |
| Specification | Grit sequence, lay, Ra, gloss, protected zones | Material removal allowance, Ra target, masking, rack points, corrosion/cleanliness requirements |
Industry-Specific Polishing Requirements
Photonics and Optical Systems
Stainless steel lens holders, mirror mounts, apertures, alignment hardware, and optical instrument components often need controlled reflectivity rather than maximum shine. A bright surface near the optical path can create stray reflections, while a polished locating surface may help cleaning or assembly. The drawing should separate optical, cosmetic, mounting, and protected datum zones. Dimensional control after polishing is especially important around bores, threads, dowel holes, knife edges, and alignment faces.
Quantum Instruments and Vacuum-Compatible Assemblies
Quantum sensing, cryogenic, and vacuum systems may prioritize cleanliness, low particle retention, corrosion resistance, low outgassing process compatibility, and repeatable assembly. Polishing is only one part of the surface-control plan. Material traceability, noncontaminating abrasives, controlled cleaning, passivation or electropolishing, and protective packaging may be equally important. For UHV or cryogenic parts, finish requirements should be reviewed with the customer’s vacuum, bakeout, and cleaning specification.
Food Machinery
Product-contact parts such as nozzles, manifolds, depositor components, pump parts, guides, and sanitary fittings benefit from smooth, cleanable surfaces that reduce residue traps. Specify roughness on the actual product-contact zone, remove burrs and crevices, control weld finishing, and ensure compounds are fully removed. A mirror look is not automatically sanitary; cleanability also depends on geometry, drainage, joints, weld quality, and the validated cleaning process.
Medical Devices
Medical-device components may require controlled surface finish for cleanability, corrosion resistance, assembly, appearance, or interaction with tissue and fluids. Requirements differ greatly between an external equipment housing and an implantable or patient-contact component. The manufacturer should work to the approved drawing, risk controls, cleaning validation, and applicable regulatory and material requirements. Rollyu Precision supports projects under ISO 13485 and ISO 9001 quality systems; customer-specific validation and acceptance criteria remain essential.
Dental Equipment
Dental handpiece parts, instrument components, surgical guides, brackets, housings, and sterilizable equipment may combine fine cosmetic surfaces with tight fits and repeated cleaning cycles. The polish must be consistent around small radii and complex contours without softening functional edges or damaging threads. Cleaning, passivation, corrosion performance, and lot-to-lot appearance should be agreed during first-article approval.
Common Polishing Defects and How to Prevent Them
| Defect | Likely Cause | Prevention / Corrective Action |
| Residual deep scratches | Advanced to a finer grit too early | Return to the last effective grit; inspect under directional light |
| Wavy or distorted reflection | Uneven pressure, excessive local polishing, soft substrate | Use stable fixturing, controlled passes, and flatness checks |
| Rounded edges / enlarged holes | Tool overrun at boundaries | Mask or protect features; use smaller controlled tools; leave process allowance |
| Burn marks / discoloration | Excess heat, loaded abrasive, high pressure | Reduce pressure, refresh media, control speed, allow cooling |
| Cross-grain lines | Inconsistent polishing direction | Standardize stroke direction and inspect between stages |
| Contamination / rust staining | Tools previously used on carbon steel or poor cleaning | Use dedicated stainless tooling and controlled cleaning |
| Compound trapped in features | Excess compound or inaccessible geometry | Limit compound, clean ultrasonically where appropriate, inspect holes and channels |
| Lot-to-lot color or gloss variation | Media wear, operator variation, inconsistent starting surface | Lock process parameters and approve a visual master sample |
Quality Control for Polished Stainless Steel Parts
- Surface roughness: measure Ra at defined locations and in the specified direction; use equipment appropriate to the feature size and expected range.
- Dimensional inspection: verify critical fits, thickness, flatness, runout, hole size, and sealing features after finishing—not only before polishing.
- Visual inspection: use controlled lighting, viewing distance, orientation, and an approved reference sample when appearance matters.
- Edge and burr inspection: confirm that edges are safe and clean while functional sharp features remain within drawing requirements.
- Cleanliness: inspect for compound, abrasive, fingerprints, residue, trapped media, and packaging contamination.
- Corrosion-control verification: apply the specified passivation/electropolishing process and any agreed test or certification requirements.
- Traceability: link material, polishing route, inspection results, and first-article approval to the production lot.
How to Specify Polishing on an RFQ or Drawing
| Requirement | Example of Useful Information |
| Material | 316L stainless steel, certified material required |
| Surface zone | All product-contact surfaces; exclude threads and gasket datum A |
| Finish target | Mechanical polish followed by electropolish, or directional No. 4 appearance |
| Roughness | Ra ≤ project value at marked locations; measurement direction and method defined |
| Geometry protection | No edge break on optical aperture; mask M3 threads; maintain bore size after finish |
| Cleaning / post-treatment | Ultrasonic cleaning, passivation/electropolishing, DI-water rinse, controlled drying |
| Visual acceptance | No pits, drag lines, compound residue, or cross-grain scratches; approved sample controls appearance |
| Documentation | Material certificate, dimensional report, roughness results, finish certificate, first article as required |
| Packaging | Individual nonabrasive protection; prevent part-to-part contact |
Frequently Asked Questions
What is the best way to polish stainless steel?
The best method depends on the starting condition, geometry, and functional requirement. Mechanical polishing is effective for scratch removal, directional finishes, and mirror appearance. Electropolishing is often selected for micro-smoothing, cleanability, and complex exposed geometry. Many industrial parts use a qualified combination of machining, mechanical polishing, cleaning, passivation, or electropolishing.
How do you polish stainless steel to a mirror finish?
Remove defects with the least aggressive suitable abrasive, progress through increasingly fine grits without skipping unresolved scratches, then use dedicated buffing wheels and fine compounds. Control heat and pressure, clean between stages, and inspect for waviness and edge rounding. Specify Ra and visual acceptance separately when performance matters.
Can you polish scratches out of stainless steel?
Light scratches can often be blended. Match the original finish and grain direction, test a small area, and rebuild the complete finishing sequence. Deep scratches on sealing faces, thin walls, or dimensional datums require engineering review because repair removes material.
How do you polish brushed stainless steel?
Polish in the original grain direction using an abrasive grade that matches the approved texture. Work the entire cosmetic zone with consistent pressure. Circular rubbing or cross-grain blending usually creates a visible mismatch.
Does a lower Ra always mean a better finish?
No. A lower Ra indicates a smoother measured profile, but the correct finish depends on function. Optical systems may need low glare; adhesive or coating interfaces may need controlled texture; sealing and sanitary surfaces may need specific roughness and geometry. Ra also does not fully describe waviness, pits, directional lay, or cleanliness.
Is passivation the same as polishing?
No. Polishing changes surface topography by removing material. Passivation is a chemical treatment used to remove free iron and support the stainless steel passive layer. Passivation does not erase machining marks or create a mirror finish.
Is electropolishing suitable for medical and food equipment parts?
It can be suitable when the material, geometry, material-removal allowance, cleaning, and validation requirements are properly controlled. Suitability must be determined from the specific device or equipment specification rather than assumed from appearance alone.
Which stainless steel grades can Rollyu Precision machine and finish?
Rollyu Precision supports commonly specified grades including 303, 304, 316/316L, 416, 420, 440C, 15-5PH, and 17-4PH, subject to geometry, heat-treatment condition, finish requirement, and project review.
What files should I send for a polishing quotation?
Send the 3D CAD model, controlled 2D drawing, material grade, quantity, target Ra, finish designation, grain direction, protected surfaces, cleaning or passivation requirements, inspection documents, and representative appearance photos if cosmetic matching is required.
Why Work with Rollyu Precision?
Rollyu Precision provides CNC milling, turning, EDM, grinding, polishing coordination, surface finishing, and dimensional inspection for stainless steel components. Our engineering review focuses on the relationship between machining allowance, finishing stock removal, tight-tolerance features, cleanliness, and final inspection. We support prototype and production projects for photonics, quantum technology, food machinery, medical devices, dental equipment, motion control, and other precision industries.
- ISO 9001:2015 and ISO 13485:2016 quality management systems
- Precision CNC machining with project-specific tolerance review
- Support for mechanical polishing, passivation, electropolishing, and related finishing routes
- CMM and dimensional inspection planning for finished parts
- One engineering and commercial contact from drawing review through delivery
| Need a Polished Stainless Steel Part That Still Meets the Drawing?
Send your CAD files, 2D drawing, material grade, target Ra, finishing requirement, and annual quantity. Rollyu Precision will review manufacturability, protected dimensions, polishing allowance, inspection, and the most suitable finishing route. Request a Quote → www.rollyu.com |